

I receive a lot of questions on my tattoo designs, but there’s one thing a lot of people want to know. “How do I place a (digital) tattoo on a body-part in Adobe Photoshop?” For my own tattoo galleries I use 5 different mock-ups on various body parts, so let me explain how I transfer my hand drawn designs to real looking examples. In only 7 easy steps!
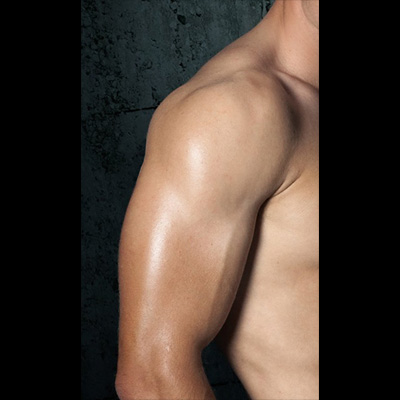
First of all, use good quality pictures of your shoulder, back or other part that you want to tattoo. Here’s an image of a blank shoulder, which I use for this tutorial, and also for my tattoo website.
You can download the image for free and use it for your own projects if you want.
Step 1:
Open the image in Photoshop
First open this shoulder image in Photoshop, which is exactly 400×400 pixels. Then get a tattoo picture that you want to place on the body. I use one of my high resolution designs from my website. Make sure your tattoo has a white background!

Step 2:
Resize the tattoo design
To match the size of the tattoo to the shoulder image, resize it to around 325 pixels wide (the height depends on the proportions of the image)

Step 3:
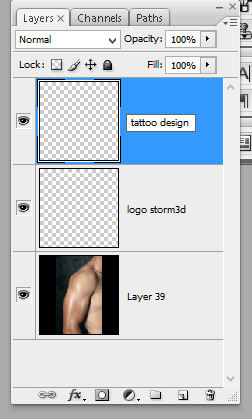
Create a new layer
Before you can place the tattoo, you need to add a new layer on the shoulder image.
You can rename that layer to “tattoo design”:
Step 4:
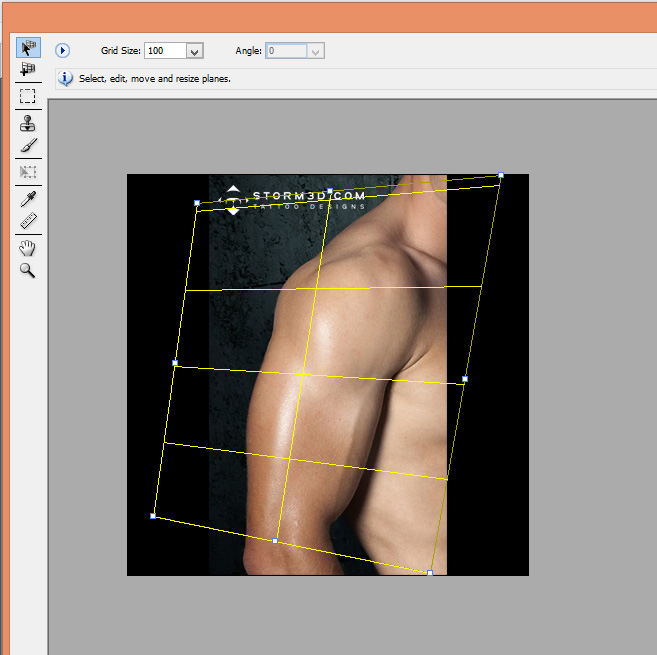
Use the Vanishing Point filter
For a realistic tattoo image, you need to match the perspective both the shoulder design and the tattoo. The filter “Vanishing Point” in Adobe Photoshop CS3 will help you with that.
First you need to copy the tattoo to the clipboard (memory), so select the tattoo => press Ctrl+A (which selects the whole image. Then press Ctrl+C (copy)
Okay, thats sorted! Let’s go to the fun part!
Go to Filter => Vanishing Point
Then draw a plane that matches the perspective of the shoulder image. You can see it’s a bit tapered to the back and the centre line corresponds with the line of the upper arm.

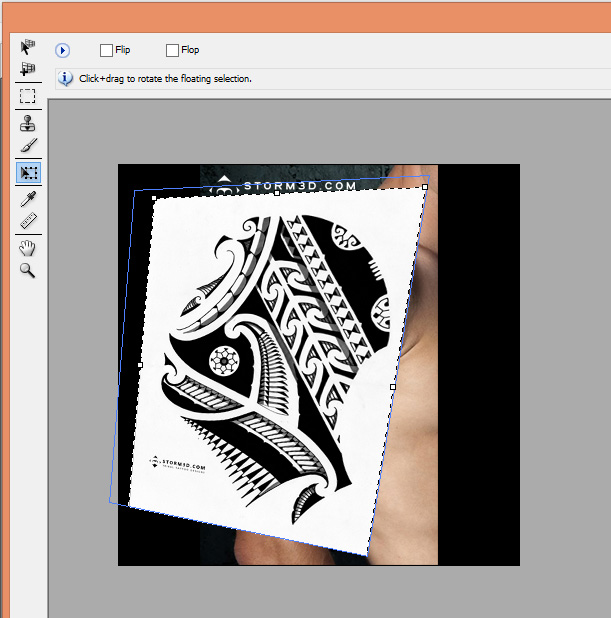
Step 5:
Paste the tattoo design
When you completed the perspective panel, simply hit Ctrl+V to paste the tattoodesign. You can scale it a bit to match the shoulder, with the selected tool in the picture below. Hit enter when you’re happy with the size.
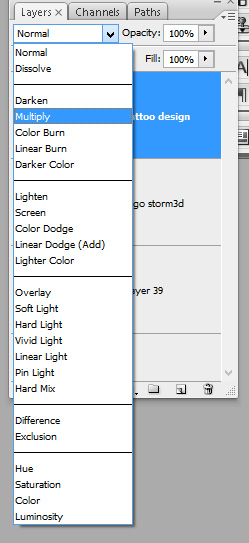
To get rid of the white background, go to your layer palet and select “multiply” from the drop-down list, as shown in the picture.

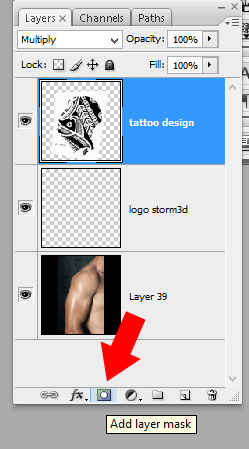
Step 6:
Add a layer mask
The tattoo covers the whole image and extends to the background as well. This is not how we want it, so lets add a layer mask. By using a layer mask, you can hide certain parts of the image.
Ok, simply select the tattoo design layer and hit the add layer mask button at the red arrow:

With the layer mask selected, you can use the black brush to paint/erase all parts of the tattoo that you want to hide.
(to reveal it back, simply use a white brush)
There are multiple ways to hide these parts. You can also select the boundary of the shoulder with the selection tools and fill it with black for example.

The final digital tattoo
Congratulations! You finished this tutorial and made your first digital tattoo mockup. If you want more information, or have questions, please leave a comment below!
Cheers Mark
Ps. don’t forget to check my tattoo galleries for the latest high quality Polynesian tribal flash drawings!

